Here is the link to the source code in Github
Saturday, September 5, 2020

Thursday, May 10, 2018
RESTful API
In this blog post I am going to show how to create a resource server api. First we need to understand how it works.

If you want you can use existing authorization server like wso2 identity server. But I created authorization server and resource server both in a single api. There is an endpoint that you can call in order to retrieve the resources.
This is written using node.js. In order to run this on your computer you have to have node.js installed on your comouter.
The sample code is uploaded to the Github and the link is mentioned below.
https://github.com/sajith01prasad/RESTful-API.git
app.js

As you can see oauth grant type I have given is client_credentials. This has to be mentioned in the request body when you try to get the access token from authorization server.
Also this app tuns on port 4000. You can give any port number here.
There are two endpoints I have created in this. One to get the access token which is "/oauth/token" and the other one is to get resources which is "/profile".
As resources I have hardcoded one value which is name ("sajith") and this comes as a JSON object.
model.js


Here I have created a user first (username = test, password = test) and all the functions that handle requests from client are written in this file.
Run

Now Let's run this resource server using node.js.
To make all get and post requests to the resource server we use RESTclient Mozilla Firefox Add on. You can use other similar products such as Postman for this.
First of all We have to make a POST request to get the access token from the authorization server.
For that we have to send the authorization key in the header.
Authorization : Bearer XXXXXXXXXXXXXXX
And also we have to mention the content type in the header.
Content-Type : application/x-www-form-urlencoded
If you are using restClient on firefox like I discuss in this blog post you will have to go through the Oauth_data_collection.json file I have provided and type the Authorization Bearer token value manually. In order to find the correct token value you can map it with Content-Type which is application/x-www-form-urlencoded.
If you do not want to do this manually you can simply import the json file to Advanced rest client extension in Chrome store. A screenshot is provided below.


Click on Open From File. Then browse the json file and upload it it.
Once you upload it you will see something like this.

Requests are added to the favorites. Click on the first POST request.

I will show how to do the same thing with RestClient on Mozilla Firefox with creating all the requests manually and of course how to retrieve resources.
Then we have to mention these 3 parameters in the body.
username=test
password=test
grant_type=client_credentials
The URL should be the endpoint that gives us the access token.
http://localhost:4000/oauth/token

When we send this we get the response which has access token in it. This access token also have an expiration time.
Then we have to make a GET request to retrieve the resources we need.

Now our URL is different because we have to call a different endpoint to get these resources which is "http://localhost:4000/profile".
We do not have to mention anything in the body.
In the request header we should send the access token we got in the previous step.
Authization: Bearer XXXXXXXXXXXXXXX
Make sure that the access token is not expired. Otherwise you will get an error message saying that it has expired.
When you sent this request you get a response that contains the resources we specified in the code.
{"name":"sajith","id":"set"}
Thank you :)
Cross Site Request Forgery - method 02
In the previous blog post, I discussed how to achieve CSRF attack protection using synchronized token pattern method. In this post, I will be discussing how to do it using double-submitted cookie pattern.

As you can see in the above diagram, in double-submitted cookie pattern two cookies (for the session and for the csrf token) are stored in the browser.
In our previous method, we stored csrf token values on the server side (text file). But here we don't do it.
Sample website created for this is uploaded to my Github and the link is mentioned below.
https://github.com/sajith01prasad/Cross-Site-Request-Forgery---method-02.git
index.php
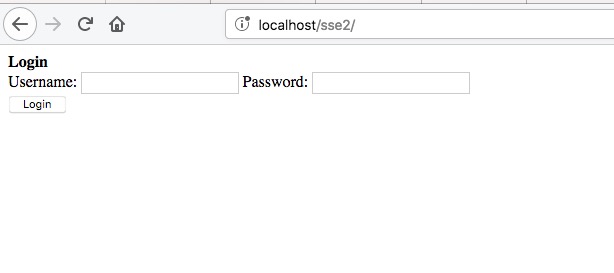
once this page gets loaded on the web browser user sees a simple login form. Username and password are hardcoded in the code.

result.php


As you can see two cookies are stored on the browser. These cookies have 1 year expiration time and they are accessible from anywhere.
Javascript function is written to retrieve the csrf value from the csrf cookie set on the browser. Then DOM will be modified with the value that is retrieved from the csrf cookie.
home.php

csrf cookie value and the html hidden field csrf value are sent to the checkToken function as parameters.
token.php

This function returns true if the csrf token values get matched.
This is the second way of protecting your website from csrf attacks with the help of double submitted cookie pattern.
Thank you.
Cross Site Request Forgery - method 01
What is Cross Site Request Forgery?
Cross-Site Request Forgery (CSRF) is an attack that forces an end user to execute unwanted actions on a web application in which they're currently authenticated. CSRF attacks specifically target state-changing requests, not theft of data since the attacker has no way to see the response to the forged request.
In this blog post, I will be discussing a method that can be used to protect your own website by generating Cross-Site Request Forgery Tokens in server side and validating them before respond to any client request.
The sample website source code is uploaded to the GitHub and you can download it from there. The link is mentioned below.
https://github.com/sajith01prasad/Cross-Site-Request-Forgery---method-01.git
I will be using code screenshots of .php files to explain what happens inside the code.
There are 5 .php files and one. txt file.

What does this website do? User logs into the website using his/her credentials (username and password are hardcoded "sajith", "sajith"). Upon the log in a session will be created and the session id will be used to map with the CSRF token that will be generated along with the session creation.
Then the user redirects to a web page that allows the user to update a post. When this page loads with the help of AJAX, generated CSRF token value will be added to a hidden field in the HTML form.
Once the user updates a post CSRF token will be validated. If it is valid user will see the post he updated......

index.php

Once the form is submitted result.php will be called.
result.php


A simple php code is written on top of the page to validate the user inputs.
As you can see Ajax is used call the csrf_token_generator.php file to get the generated CSRF token value and put it inside the hidden textfield in the HTML form.

csrf_token_generator.php
This php file generates the csrf token. Also it sets a browser cookie with the value of session_id. After that CSRF token value will be stored in a text file called Tokens.txt along with it's session_id.

openssl_randon_pseudo_bytes() is used to generate the 32bit long csrf token. In order to use this function you have to have openssl installed. Otherwise it will give you an error. The generated value then converted into it's base64 value using base64_encode() function in order to make it more secure.
token.php

this php file has checkToken function which gets two parameters (csrf token and session id) and return true if the given parameters matches with the values that are stored inside the text file.
Tokens.txt

home.php

This is where checkToken function gets called.

Saturday, September 9, 2017
Beauty of robots.txt
If you are a computer geek who plays Capture the flag and stuff you probably know what this is.
Let's see what is robots.txt.
Have you ever wondered how your search engine crawls through hundreds of web pages in websites and give you exact page which contains the content that you searched? Or what gives instructions to your search engine? In a more clear and accurate way, how the search engine knows which pages he should crawled through. Well this is where robots.txt comes in to play. robots.txt is a text file webmasters create to instruct web robots (typically search engine robots) how to crawl pages on their website.
Basic format of the robots.txt file would look like this,

Syntax
- User-agent : The specific user-agent (web crawler) to which we give instructions.
- Allow : This works only with Googlebot. Says Googlebot can access particular directory or sub directory even the parent directory of that is disallowed.
- Disallowed : Tells not to crawl on the particular URL.
- Sitemap : Used to call out the location of any XML sitemap(s) associated with this URL.
- Crawl-delay : Says how many milliseconds the crawler should wait before crawling through the content
Let's say there is a robots.txt file like this.
User-agent: Googlebot
Disallow: /
This says Googlebot cannot crawl on any page of this particular website.
Requirements
1. robots.txt file should be in the top directory of the website. (eg:- a.com/robots.txt)
2. File name is case sensitive. All in simple.
3. robots.txt is not for hiding private information. Any website which has a robots.txt must make it publicly available.
4. If the sub domain changes the robots.txt file should also be changed.
eg - A.com and a.A.com should have two different robots.txt files.
5. Best practice - add sitemap at the bottom of the robots.txt file.
Which network adapter you should use in Virual Machine
If you are installing or importing virtual machines on whatever the platform you use (eg - Virtualbox, VMware) you might have wondered what are those networking options you find under network adapter settings. Well in most of the times you just switch from one to another until it gives you the output you expect. But it will be useful and come in handy if you know what they actually do and why those options are there.
In virtual box you will find this under options -> network

As you can see there are 6 options without not attached option.
Let's see why these guys are there.
1. NAT (Network Address Translation)
You can use this mode if you use your virtual machine to access internet, send emails and download files.
2. NAT Network
This is the newer version of NAT the Virualbox came up with. You will find this option on virtualbox version 4.3 onwards.
3. Bridged Adapter
This is considered as the advanced option among others. If your virtual machine runs any server you can use bridge network.
4. Internal Network
This can be used to create a different kind of software-based network which is visible to selected virtual machines, but not to applications running on the host or to the outside world.
5. Host-only Adapter
This can be used to create a network containing the host and a set of virtual machines, without the need for the host's physical network interface. Instead, a virtual network interface (similar to a loopback interface) is created on the host, providing connectivity among virtual machines and the host.
6. Generic Driver
This can be used if you want to interconnect two different virtual machines running on different hosts directly, easily and transparently, over existing network infrastructure.
7. Not attached
VirtualBox reports to the guest that a network card is present, but that there is no connection.
Monday, September 4, 2017
Overthewire - Natas
Level 0-1
Right click on the web page and go to the inspect element. From there we can go through the HTML source code of the web page. Inside a <div> element we can see the password for natas1.
<!--The password for natas1 is gtVrDuiDfck831PqWsLEZy5gyDz1clto -->
Level 1-2
Change the URL from natas0.natas.labs.overthewire.org to natas1.natas.labs.overthewire.org
You will see there is a text on the web page saying right clicking has been blocked. What you can do is add a plugin to your web browser which facilitates same function that inspect element function provides. If you are using Mozilla Firefox under tools, in web developer category you will find “Inspect”. Click on it. Go to first <div> element. You will see the password for natas2.
<!--The password for natas2 is ZluruAthQk7Q2MqmDeTiUij2ZvWy2mBi -->
Level 2-3
When you go to inspect elements you can see something like this.
<img src = "files/pixel.png">

Add /files/pixel.png to the end of the URL and hit enter

Click on pixel.png. There will be nothing. Now click on users.txt.

Password for natas3 is right there.
Level 3-4
There is a text on the web page saying not even the google can find this.
Type "How google finds websites" on google and read contents that are in the results.
You will know how google crawl through websites to find information.
I found this on a search result,

Now google about robots.txt files in website. Then you will get to know that robots.txt file is used by developers to store information about the website.
Add /robots.txt to the end of the URL and hit enter.

now erase /robots.txt and add /s3cr3t/ and hit enter.

Click on users.txt file. Password is right there.

Friday, August 4, 2017
Burp Suite- Spider
We use Burp Suite free edition software which is installed in kali linux operating system. Burp covers over 100 generic vulnerabilities, such as SQL injection and cross-site scripting (XSS), with great performance against all vulnerabilities in the OWASP top 10.
In this we use “spider” tool in Burp Suite. Burp Spider is a tool for automatically crawling web applications. While it is generally preferable to map applications manually, you can use Burp Spider to partially automate this process for very large applications, or when you are short of time.
I used google-gruyere website for testing purposes. This website is vulnerable for various vulnerabilities such as cross-site scripting and SQL injection.
First of I configured proxy in the web browser. ( ip address - 127.0.0.1)
Then visit the web site. https://google-gruyere.appspot.com/

Then open burp suite. In order to access this website in the browser you should forward all data packets from burp suite “Target” section.
In the site map section all the websites that have been accessed will be listed down. From there I find https://google-gruyere.appspot.com/. Then I right click on it and select “spider this host”.

By going to spider -> control I can make sure that the “spider” is running properly.

Once I clicked on “spider this host” burp suite started to scan through the website. Finally it displays all the web pages(html, text files) in the middle section of it.

Here you go. You have retrieved all the web pages in the website.
How to secure your passwords
Why passwords MUST be protected? Some of you know the reason but most of you guys are keeping your passwords safe because you see other people do it or just because of the meaning of the word "password". If you think that your Facebook password must be protected more than your Twitter account password because you don't use Twitter often you are completely wrong. I will leave the link here for you to read the story of "Epic Hacking - Mat Honan" to understand how much damage a single password can do!
First of all we should look at how to secure passwords.There are too many ways to do this but some of them are not that much accurate.
1. Two factor authentication.
This is the best way to secure passwords. Two factor authentication means instead of using one means of authentication (static/dynamic) user use two means of authentication (static & static/ dynamic & dynamic / static & dynamic ).
What are these static and dynamic means of authentication?
Static - Something that user knows or user possesses. eg:- ID card, Passcode
Dynamic - Something that user does or user is. eg:- Hand movements, Voice recognition, IRIS scanning
Advantage of having Two factor authentication is that even though an attacker knows the password for a particular account he will not get the access to it. In order to get that he has to find out the other factor also. Facebook, Gmail and other social media and services provide Two factor authentication.
2. Combination of lower case, upper case, alpha numerical characters
Passwords are vulnerable to brute force attacks. Therefore if you only use upper case or lower case letters it will be easy for an attacker to break your password.
3. Having a password which contains at least 8 characters
When the password length increases according to that number of combinations also get increase. If the number of combinations are huge process of breaking the password will take huge amount of time. Sometimes it will be not possible for the attacker because the process requires a lot of processing power.
4. Always avoid using solitary words
Solitary means existing alone. That means do not use words that exists in any language.
5. Do not use names of people, places, things, and characters
6. Do not write down passwords
Since people do not like to memorize passwords they tend to write them down on papers. Sometimes they write down credentials on a sticky note and paste it on the monitor at the work place. If that is the case why they have a password to log in? Anyone can use anyone's device or an account.
7. Always log out from devices or accounts once you are done. Otherwise workstation hijacking can occur.
Thursday, August 3, 2017
Scams on social media platforms
How many times you log into social media sites within a day? A lot right? So you must know what are the possible scams in social media platforms.

1. An attacker can ask people to share a particular post or his/her own website on other social media platforms in order to get access to a particular file or video.

2. When users go to view videos in a particular website the website will ask to install plugins to watch the video. This plugin might be a trojan horse program which will harm users’ computer or data.

3. Another incident would be click baits. Article or a video might look like it has some shocking information but the actual content inside that can be utter waste.
4. One of the most popular methods attackers use is sweepstakes or lotteries.
They will ask to fill form and submit to win a prize (g:- iPhones, trip to Malaysia etc)

5. In holiday seasons like Christmas you will be seeing a lot of fake charity events in social media platforms. They will ask you to donate money.

What are the intentions behind these scams?
1. Build a relationship
Once you submitted a form they will get your e-mail addresses and send e-mails about various different things such as advertisements, social awareness things.
2. Gather information
If the other party doing a survey or something they will gather all your information and put together to come up with a conclusion (eg :- what is the most popular mail service among people )
3. Exploit any identified vulnerability
Assume that there is a mail service called A and attackers find out a vulnerability in A server which can be used to hack all the customers of mail service A. Attackers can go through submitted forms and find out people who use service A. Then their accounts will be hacked.
4. Financial benefits
People who gather information can sell those information to another person or to an organization. This is called information brokering.
How to avoid scams?
1. Avoid clicking on suspicious links and videos.
2. Always look at the URL displayed in URL bar. If it does not look familiar or does not come from the website you wanted to visit close the window without clicking on anything.
3. Some of these scam sites are hosted on free hosting sites. Therefore they are served on HTTP . If you see HTTP instead of HTTPS(Secured) avoid it.
4. Give dummy values in textboxes if you do not trust.
5. In emails check sender’s email address. Attackers can be very smart but you have the responsible to notice even tiny differences between bogus and valid email addresses.

1. An attacker can ask people to share a particular post or his/her own website on other social media platforms in order to get access to a particular file or video.

2. When users go to view videos in a particular website the website will ask to install plugins to watch the video. This plugin might be a trojan horse program which will harm users’ computer or data.

3. Another incident would be click baits. Article or a video might look like it has some shocking information but the actual content inside that can be utter waste.
4. One of the most popular methods attackers use is sweepstakes or lotteries.
They will ask to fill form and submit to win a prize (g:- iPhones, trip to Malaysia etc)

5. In holiday seasons like Christmas you will be seeing a lot of fake charity events in social media platforms. They will ask you to donate money.

What are the intentions behind these scams?
1. Build a relationship
Once you submitted a form they will get your e-mail addresses and send e-mails about various different things such as advertisements, social awareness things.
2. Gather information
If the other party doing a survey or something they will gather all your information and put together to come up with a conclusion (eg :- what is the most popular mail service among people )
3. Exploit any identified vulnerability
Assume that there is a mail service called A and attackers find out a vulnerability in A server which can be used to hack all the customers of mail service A. Attackers can go through submitted forms and find out people who use service A. Then their accounts will be hacked.
4. Financial benefits
People who gather information can sell those information to another person or to an organization. This is called information brokering.
How to avoid scams?
1. Avoid clicking on suspicious links and videos.
2. Always look at the URL displayed in URL bar. If it does not look familiar or does not come from the website you wanted to visit close the window without clicking on anything.
3. Some of these scam sites are hosted on free hosting sites. Therefore they are served on HTTP . If you see HTTP instead of HTTPS(Secured) avoid it.
4. Give dummy values in textboxes if you do not trust.
5. In emails check sender’s email address. Attackers can be very smart but you have the responsible to notice even tiny differences between bogus and valid email addresses.
Monday, July 31, 2017
How to use Wireshark
Wireshark is the most widely used packet analyzer in the world. What can we do with this tool? Actually there are limits. If you think that you can hack into a system using wireshark that is not the case. You can actually gather information which you will need to hack into someone's system or account using Wireshark.
Visit this link to download the latest version of Wireshark.
https://www.wireshark.org/#download
Download and install the wireshark according to your system preferences.
Fire it up. You will see this user interface.

You can see all the network interfaces in your device such as WLAN, eth0 , p2p0.
If you are using Wifi just enable Wifi only. Do not enable other interfaces. Because then it will become hard for you to find expected output in results.
Once you click on start button Wireshark will start monitoring wifi traffic.
At the top of the GUI you will see a search bar called filter. This text box is very useful if you are a newbie to Wireshark. There are hundreds of filter commands out there you can use when doing your information gathering.
From this point onwards we will be looking at how to use Wireshark effectively.
Visit a website which as a login form. (Wireshark has to be on)

Now log in. After you try username and password come back to Wireshark and stop the capturing.
In the filter section type "frame contains username".
You can right click on the login form and check the textbox names. (eg- username). Otherwise filter will not work.
Now wireshark will extract only the packets which contains username out of the result. This will make you stop wasting time going through each and every packet in the result.

As you can see there are only 4 packets in the results now. Now for next step it is important to have a little bit of understanding on how TCP 3-way handshake works.

This can be used to identify packets when you are analyzing manually. How can you know whether a particular packet is sent by you or received by you(request or reply)? You can identify these things with the help of SYN, ACK values.
Right click on each packet to go through its tcp stream.

You will find username and password you entered in the TCP stream( The login site you used has to be served on HTTP).

What if someone installs Wireshark on his machine and you log into one of your accounts using his machine without knowing Wireshark is there? He can get your login credentials and log into your account at anytime he wants.
These are important filters you should know.
1) Obtain only genuine http request of the given logs.
http and tcp

2) Search for a particular IP.
ip.addr == <ip_address>
3) Search for a packet which contains an image
frame contains <name>.gif
4) ARP packet from 00:0b:86:6e:69:68 to 80:56:f2:25:63:40
arp and frame contains 00:0b:86:6e:69:68
5) To display HTTP packets with source or destination IP address equals to <Some IP>
http and ip.addr==<IP_address>
6) To display packets with source port equals to <portnumber> and destination port equals to <port>
filter - tcp.srcport eq <portnumber> and tcp.dstport eq <port>
7) To display packets with a TCP SYN flag.
filter - tcp.flags.syn == 1
8) To find the authentication username and password
filter - http.authorization
I hope you guys learned something from this blog post. Cheers !
Subscribe to:
Posts (Atom)