Thursday, May 10, 2018
RESTful API
In this blog post I am going to show how to create a resource server api. First we need to understand how it works.
If you want you can use existing authorization server like wso2 identity server. But I created authorization server and resource server both in a single api. There is an endpoint that you can call in order to retrieve the resources.
This is written using node.js. In order to run this on your computer you have to have node.js installed on your comouter.
The sample code is uploaded to the Github and the link is mentioned below.
https://github.com/sajith01prasad/RESTful-API.git
app.js
As you can see oauth grant type I have given is client_credentials. This has to be mentioned in the request body when you try to get the access token from authorization server.
Also this app tuns on port 4000. You can give any port number here.
There are two endpoints I have created in this. One to get the access token which is "/oauth/token" and the other one is to get resources which is "/profile".
As resources I have hardcoded one value which is name ("sajith") and this comes as a JSON object.
model.js
Here I have created a user first (username = test, password = test) and all the functions that handle requests from client are written in this file.
Run
Now Let's run this resource server using node.js.
To make all get and post requests to the resource server we use RESTclient Mozilla Firefox Add on. You can use other similar products such as Postman for this.
First of all We have to make a POST request to get the access token from the authorization server.
For that we have to send the authorization key in the header.
Authorization : Bearer XXXXXXXXXXXXXXX
And also we have to mention the content type in the header.
Content-Type : application/x-www-form-urlencoded
If you are using restClient on firefox like I discuss in this blog post you will have to go through the Oauth_data_collection.json file I have provided and type the Authorization Bearer token value manually. In order to find the correct token value you can map it with Content-Type which is application/x-www-form-urlencoded.
If you do not want to do this manually you can simply import the json file to Advanced rest client extension in Chrome store. A screenshot is provided below.
Click on Open From File. Then browse the json file and upload it it.
Once you upload it you will see something like this.
Requests are added to the favorites. Click on the first POST request.
Everything you need to send through the request is automatically added to the request. All you have to do is click on send button.
I will show how to do the same thing with RestClient on Mozilla Firefox with creating all the requests manually and of course how to retrieve resources.
Then we have to mention these 3 parameters in the body.
username=test
password=test
grant_type=client_credentials
The URL should be the endpoint that gives us the access token.
http://localhost:4000/oauth/token
When we send this we get the response which has access token in it. This access token also have an expiration time.
Then we have to make a GET request to retrieve the resources we need.
Now our URL is different because we have to call a different endpoint to get these resources which is "http://localhost:4000/profile".
We do not have to mention anything in the body.
In the request header we should send the access token we got in the previous step.
Authization: Bearer XXXXXXXXXXXXXXX
Make sure that the access token is not expired. Otherwise you will get an error message saying that it has expired.
When you sent this request you get a response that contains the resources we specified in the code.
{"name":"sajith","id":"set"}
Thank you :)
Cross Site Request Forgery - method 02
In the previous blog post, I discussed how to achieve CSRF attack protection using synchronized token pattern method. In this post, I will be discussing how to do it using double-submitted cookie pattern.
As you can see in the above diagram, in double-submitted cookie pattern two cookies (for the session and for the csrf token) are stored in the browser.
In our previous method, we stored csrf token values on the server side (text file). But here we don't do it.
Sample website created for this is uploaded to my Github and the link is mentioned below.
https://github.com/sajith01prasad/Cross-Site-Request-Forgery---method-02.git
index.php
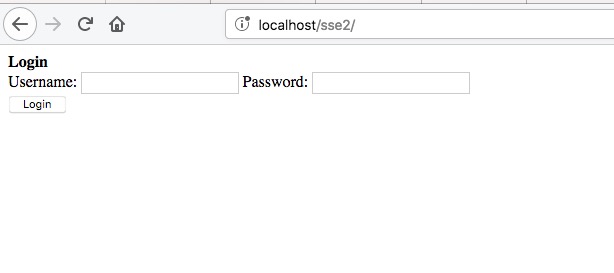
once this page gets loaded on the web browser user sees a simple login form. Username and password are hardcoded in the code.
result.php
As you can see two cookies are stored on the browser. These cookies have 1 year expiration time and they are accessible from anywhere.
Javascript function is written to retrieve the csrf value from the csrf cookie set on the browser. Then DOM will be modified with the value that is retrieved from the csrf cookie.
home.php
csrf cookie value and the html hidden field csrf value are sent to the checkToken function as parameters.
token.php
This function returns true if the csrf token values get matched.
This is the second way of protecting your website from csrf attacks with the help of double submitted cookie pattern.
Thank you.
Cross Site Request Forgery - method 01
What is Cross Site Request Forgery?
Cross-Site Request Forgery (CSRF) is an attack that forces an end user to execute unwanted actions on a web application in which they're currently authenticated. CSRF attacks specifically target state-changing requests, not theft of data since the attacker has no way to see the response to the forged request.
In this blog post, I will be discussing a method that can be used to protect your own website by generating Cross-Site Request Forgery Tokens in server side and validating them before respond to any client request.
The sample website source code is uploaded to the GitHub and you can download it from there. The link is mentioned below.
https://github.com/sajith01prasad/Cross-Site-Request-Forgery---method-01.git
I will be using code screenshots of .php files to explain what happens inside the code.
There are 5 .php files and one. txt file.
What does this website do? User logs into the website using his/her credentials (username and password are hardcoded "sajith", "sajith"). Upon the log in a session will be created and the session id will be used to map with the CSRF token that will be generated along with the session creation.
Then the user redirects to a web page that allows the user to update a post. When this page loads with the help of AJAX, generated CSRF token value will be added to a hidden field in the HTML form.
Once the user updates a post CSRF token will be validated. If it is valid user will see the post he updated......
index.php
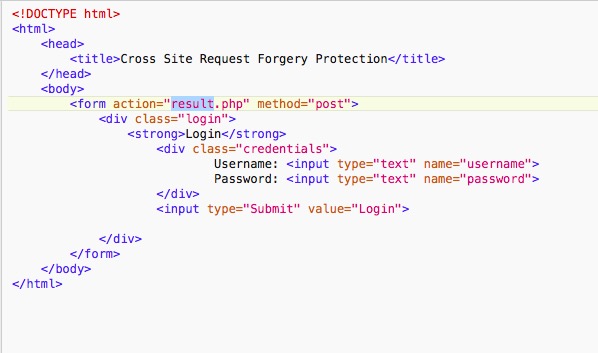
Once the form is submitted result.php will be called.
result.php
A simple php code is written on top of the page to validate the user inputs.
As you can see Ajax is used call the csrf_token_generator.php file to get the generated CSRF token value and put it inside the hidden textfield in the HTML form.
csrf_token_generator.php
This php file generates the csrf token. Also it sets a browser cookie with the value of session_id. After that CSRF token value will be stored in a text file called Tokens.txt along with it's session_id.
openssl_randon_pseudo_bytes() is used to generate the 32bit long csrf token. In order to use this function you have to have openssl installed. Otherwise it will give you an error. The generated value then converted into it's base64 value using base64_encode() function in order to make it more secure.
token.php
this php file has checkToken function which gets two parameters (csrf token and session id) and return true if the given parameters matches with the values that are stored inside the text file.
Tokens.txt
home.php
This is where checkToken function gets called.
There are many ways to protect your website from CSRF attacks. In my next blog post I will be discussing another method to achieve this. Have a good day people!!!
Subscribe to:
Comments (Atom)


