Saturday, September 9, 2017

Beauty of robots.txt


If you are a computer geek who plays Capture the flag and stuff you probably know what this is.
Let's see what is robots.txt.

Have you ever wondered how your search engine crawls through hundreds of web pages in websites and give you exact page which contains the content that you searched? Or what gives instructions to your search engine? In a more clear and accurate way, how the search engine knows which pages he should crawled through. Well this is where robots.txt comes in to play. robots.txt is a text file webmasters create to instruct web robots (typically search engine robots) how to crawl pages on their website.

Basic format of the robots.txt file would look like this,


 There can be multiple lines of User-agent, Disallow statements in a single robots.txt file.

Syntax
  • User-agent : The specific user-agent (web crawler) to which we give instructions.
  • Allow : This works only with Googlebot. Says Googlebot can access particular directory or sub directory even the parent directory of that is disallowed. 
  • Disallowed : Tells not to crawl on the particular URL.
  • Sitemap : Used to call out the location of any XML sitemap(s) associated with this URL. 
  • Crawl-delay : Says how many milliseconds the crawler should wait before crawling through the content

Let's say there is a robots.txt file like this.

User-agent: Googlebot
Disallow: /

This says Googlebot cannot crawl on any page of this particular website.

Requirements

1. robots.txt file should be in the top directory of the website. (eg:- a.com/robots.txt)
2. File name is case sensitive. All in simple.
3. robots.txt is not for hiding private information. Any website which has a robots.txt must make it publicly available.
4. If the sub domain changes the robots.txt file should also be changed.
eg - A.com and a.A.com should have two different robots.txt files.
5. Best practice - add sitemap at the bottom of the robots.txt file.





Which network adapter you should use in Virual Machine


If you are installing or importing virtual machines on whatever the platform you use (eg - Virtualbox, VMware) you might have wondered what are those networking options you find under network adapter settings. Well in most of the times you just switch from one to another until it gives you the output you expect. But it will be useful and come in handy if you know what they actually do and why those options are there.

In virtual box you will find this under options -> network


As you can see there are 6 options without not attached option.
Let's see why these guys are there.

1. NAT (Network Address Translation)

You can use this mode if you use your virtual machine to access internet, send emails and download files.

2. NAT Network

This is the newer version of NAT the Virualbox came up with. You will find this option on virtualbox version 4.3 onwards.

3. Bridged Adapter

This is considered as the advanced option among others. If your virtual machine runs any server you can use bridge network.

4. Internal Network

This can be used to create a different kind of software-based network which is visible to selected virtual machines, but not to applications running on the host or to the outside world.

5. Host-only Adapter

This can be used to create a network containing the host and a set of virtual machines, without the need for the host's physical network interface. Instead, a virtual network interface (similar to a loopback interface) is created on the host, providing connectivity among virtual machines and the host.

6. Generic Driver

This can be used if you want to interconnect two different virtual machines running on different hosts directly, easily and transparently, over existing network infrastructure.

7. Not attached

VirtualBox reports to the guest that a network card is present, but that there is no connection.


Monday, September 4, 2017

Overthewire - Natas


Level 0-1

Right click on the web page and go to the inspect element. From there we can go through the HTML source code of the web page. Inside a <div> element we can see the password for natas1.

<!--The password for natas1 is gtVrDuiDfck831PqWsLEZy5gyDz1clto -->

Level 1-2

Change the URL from natas0.natas.labs.overthewire.org to natas1.natas.labs.overthewire.org
You will see there is a text on the web page saying right clicking has been blocked. What you can do is add a plugin to your web browser which facilitates same function that inspect element function provides. If you are using Mozilla Firefox under tools, in web developer category you will find “Inspect”. Click on it. Go to first <div> element. You will see the password for natas2.

<!--The password for natas2 is ZluruAthQk7Q2MqmDeTiUij2ZvWy2mBi -->

Level 2-3

 When you go to inspect elements you can see something like this.
<img src = "files/pixel.png">


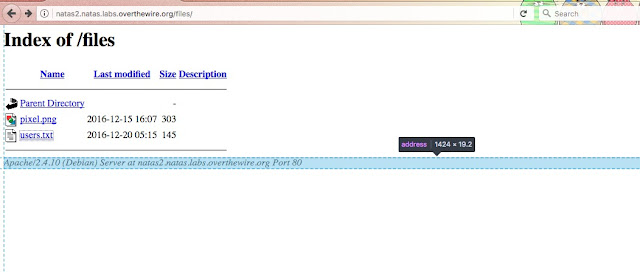
Add  /files/pixel.png to the end of the URL and hit enter


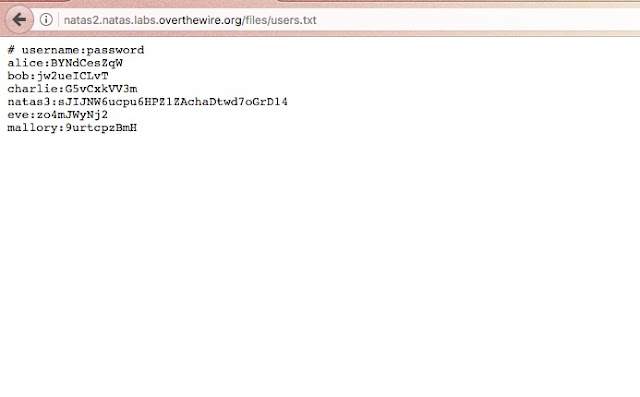
Click on pixel.png. There will be nothing. Now click on users.txt.


Password for natas3 is right there.

Level 3-4

There is a text on the web page saying not even the google can find this.
Type "How google finds websites" on google and read contents that are in the results.
You will know how google crawl through websites to find information.

I found this on a search result,


Now google about robots.txt files in website. Then you will get to know that robots.txt file is used by developers to store information about the website.
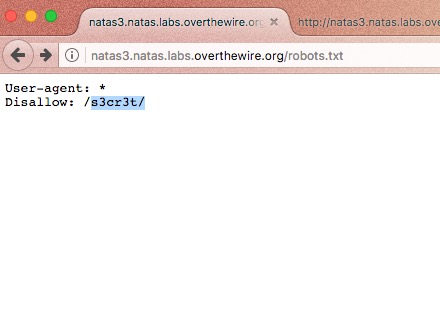
Add /robots.txt to the end of the URL and hit enter.


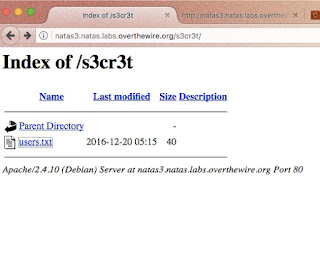
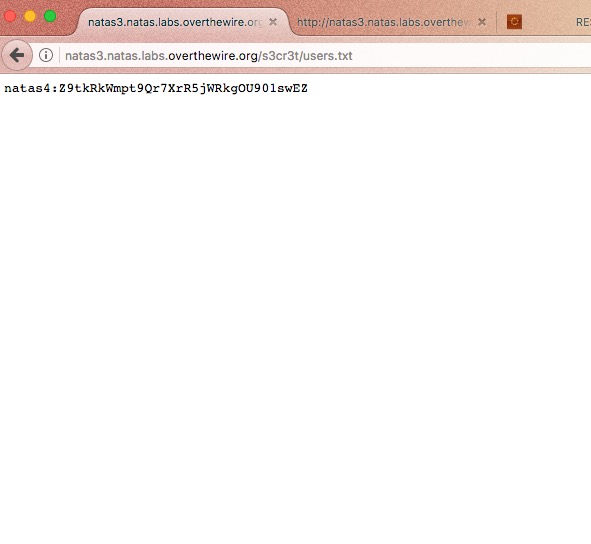
now erase /robots.txt and add /s3cr3t/ and hit enter.


Click on users.txt file. Password is right there.